
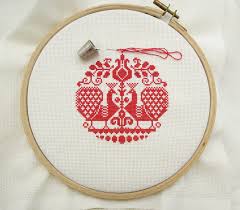
With the holidays coming, you will get loads of use for your embroidery stitches to make great gifts and unique cards
Line Stitch and Blanket Stitch
Materials Needed:
- handmade paper (or cardstock)
- embroidery floss
- embroidery needle
- scissors
- hot glue gun and sticks
- tape
- scrap raffia or twine
- Stampers and embellishments (optional)
For our sample, I am going to use a sheet of 8 1/2″ x 11″ paper, but you can work with any size you prefer. I start by folding it in half and gently tearing it. I could cut it for a precise look, but I want this one to be more organic.
Fold your handmade paper in half to make the base of your card. Mine is now 4 1/2″ x 5″. Take the remnant of paper and tear off a piece approximately 3″ x 3″. I am not worried about neatness. Being irregular in shape is a good thing. I can also use a piece of paper from a different color, texture or design sheet.
Using a small piece of tape rolled and placed behind the torn piece, attach the torn piece to the middle of the card front.
Now thread your needle.
Line Stitch
Open the card back up and beginning about a half inch in from the remnant edge, poke the needle through. Image a line drawn all the way around the remnant that leaves a half inch salvage edge. This is where we are going to sew. Along this imaginary line, move up about ¼ of an inch and push the needle through. Now from the back move the needle up another ¼ of an inch along your imaginary line and pull the needle through. Now I want you to back up to the spot the needle entered the paper from the front to the back the last time. ** Push the needle through the front to back. Your line on the front of the card should have just doubled in length. In the back of the inside flap, it should look like a knot, space, needle coming out and line. Now working from the back of the card front, keeping in mind still that imaginary line in the front, go beyond the ¼ inch stitch another ¼ of an inch and push the needle through. Now from the front you are once more going to back up to where the thread last went into the paper front to back. Continue from ** all the way around. Tie off in the back.
Blanket Stitch
Using another thread, you are going to sew around the outside edge of the card front and back. The thread can be the same color or different; it is totally up to you.
From the bottom center of the card back, beginning on the outside, push the needle through about ¼ inch from the bottom edge. Pull the needle up but do not pull tight. Leave a little slack for now. We will come back to it after we go all around the edge. **The needle is now on the inside of the card on the bottom. Take it back to the outside of the card and moving about ¼ inch along the bottom push the needle through again. This time add another step. The loop that was made between the first and second stitch is your target. After you push the needle through the paper go back and put the needle through this loop and pull enough to eliminate the slack at this stitch. Don’t worry if there is still slack from the first stitch.
Now repeat from ** all the way around making sure to pick up the slack from the first stitch on your last stitch.
Take two pieces of raffia or twine about 6″ long and glue them inside the cover front and back center. Cover by cutting a piece of the remnant in a triangular shape and gluing that over the top with the triangle pointing in the direction of the cards center crease.
On the front of the card, you can stamp, emboss or embellish any way you want. You can also leave it blank and put your sentiment on the inside so that it is like a private treasure. For mine, I will add some dainty dried flowers tied with a small piece of twine.
Now tie your two pieces of raffia and you are done. Try different embellishments and materials and as always, just have fun with it.
On the inside, you can stamp your words or use nice markers or calligraphy pens to the letter.
Now if you are concerned about the stitching on the inside cover, cut or tear a piece of a remnant to cover and glue in place.