
Machine Embroidery is an amazing and wonderful addition to the world of sewing machines. According to Wikipedia, the first home embroidery sewing machine was created by Janome in 1990. The Memory Craft 8000. I can actually remember this machine. My Viking dealer at the time was also a Janome dealer. I remember seeing all the wonders of this machine in a demo back then. I didn’t quite get it at the time at how revolutionary this process was going to affect the world of sewing and it would be another twelve years before I’d even think of purchasing an actual embroidery sewing machine.
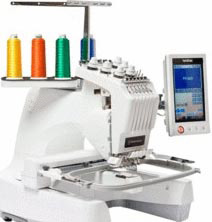 I did purchase new machines in 1992, the Bernina 1230 and the Pfaff 1475cd, which I was the first machine to offer software to use on your pc as well to hook up and use with your machine. However, it wasn’t a embroidery machine like today’s machines are. I ended up not using my Pfaff machine and gave it to my sister some number of years later when she moved from England to the USA. I then purchased a Brother Ult 2001 and a year later a Viking Designer 1 in 2002 and 2003, and both machines are still the machines I use today in 2014.
Hoop sizes for machines have changed quite drastically since I started machine embroidery in 2002. Both of my machines have 6×10 hoop fields, but the actual sewing areas of those fields is quite different.
As a for instance, this is my largest hoop size of my Ult 2001, it is 10.2″ x 6.3″ which means my sewing area is 6.30 x 10.24 so I could have a design of 6.18 x 10.20 and it would stitch out just fine.
However, my Designer 1 is a 6×10 hoop as well, but the sewing area is 5.91 x 9.45 which seems short to me. I’ve always wondered why if it’s suppose to be a 6 x 10 field, why I don’t get 6 x 10. I couldn’t put that 6.18 x 10.20 design into any of my hoops without splitting then multi-hooping the design in my Designer 1.
When I considered purchasing a Bernina 6×10 field, I was absolutely upset to find out the field was actually only 5.71 x 10.04, but it’s an oval hoop, which means you get 5.71 in the area that isn’t an oval section on the width and that 6.18 x 10.20 inch design would not fit into this hoop without again splitting then multi-hooping it. Even if the hoop was square, it still needed to be split and multi-hooped because to me this is not a 6×10 field. It’s kinda funny to me that Bernina allowed this, because Brother makes the embroidery unit for their embroidery machines.

Knowing your hoop size is important. The design needs to fit within your hoop size to stitch properly. If the size is to large, it will always need to be split and then multihooped and you need editing software to do this. If you don’t have editing software for your machine brand, you really should consider looking into purchasing editing software.
A good hoop chart that I have used for years is kept up-to-date by Missi at Skeldale House. Her chart is located here.
Learning how to edit designs is important, whether your doing something as simple as switching the hoop, or something as complex as splitting a design, it’s important to learn these things to make your embroidery by machine experience a much more richer and fulfilling experience. By far and away, with a pretty stiff learning curve, the best software for this purpose is Embird. It is amazing software that does everything and more that you need it to. Embird also comes along with a whopper of a support community, tutorial authors, and the creators are also active in the community. Other software that do not cost as much but also do not do as much and don’t have the support one needs to learn it are: Buzz Edit, Sew What Pro, and Embrillance. Embrillance is the newest of the editing software and seems to be gaining a wide spread support mechanism. It is pretty expensive tho and is sold in modules. All the sewing companies own software have editing portions of their software as well, but what I don’t know is if they are sold separately. Since the sewing companies often charge in the 1000’s of dollars for their software, I would hope that they would have just editing software only. Even with my viking, I purchased the whole Embroidery suite, I have done so since version 3, and I’ve never taken the time to learn it until this year when I updated to 6D. I think it’s time. I actually found the editing in the software to be quite easy.
Fields are something you need to know about your hoop and this is the biggest reason I have held off giving different machine embroidery formats in my designs I’ve offered in my patterns. I prefer to be sure that the hoop chosen for that format is correct, but as I’ve had more requests for the .art format in particular, I’ve realized that I can save it to that format and let the person who buys the pattern worry with editing the design to fit their hoop. I will later create lessons on how to edit designs to fit the hoop and not by resizing them either. You can’t just resize my designs without resizing the entire block since the embroidery designs are based on the size of the block itself and not the embroidery design that goes with the block.
The next big thing to know about is stabilizers. Even today, I do not know everything their is to know about stabilizers. Their are so many on the market, it’s hard to keep track of all the different brands and types.
The big three are:
- Cutaways
- Tearaways
- Water Soluble
A newer type of stabilizer is Heat Away. I have never used this type so have no knowledge of how it works.
Most digitizers recommend cutaways for most designs. I personally can not stand cutaways. It’s kind of like applique in away, your always going to take the chance that you cut into your backing fabric by using cutaways.
I prefer to use Water Soluble and Lightweight tearaways as my main choices for stabilizers. Most of the designs I’ve offered on this site don’t need anything but lightweight stabilizers.
Store your water soluble stabilizers in a plastic freezer type bag to keep them from drying out.
Store other stabilizers especially rolls, with something around them that tells you what they are. I keep mine stored with a hair band around the rolls, and a piece of paper that tells me brand, type, and weight of the stabilizer. I can’t tell you how many times I’ve been saved by being able to know what type it is.
A good video for more information about stabilizers can be viewed below or watched on Youtube. It is provided by TLC Inspirations.
Getting the design to your machine can be interesting. Both of my embroidery machines still use floppy drives. Today’s pc’s no longer use floppy drives, but if your embroidery machine needs a floppy drive, you can simply visit your favorite computer store and purchase a external floppy drive that will hook into any usb port on your pc.
If your machine uses a flash drive, these to can easily be purchased at your nearest computer store. Stay with a small one, and the reason for this is because while you might think using the largest flash drive is cool to do, it really isn’t. Most machines won’t support more than a certain sized flash drive, so it’s important to know the absolute biggest size your flash drive can handle. As a for instance, most digital cameras will not recognize a 64gig card, but will be fine with 32gig cards. The other reason for keeping it slim and trim is speed of loading on your machine. Do not load your flash card up with a ton of designs your not stitching out. Keep it small, only fill your card with the designs your planning to stitch out at the time you sit at your machine to stitch designs out. Keeping it small allows your loading time to be much faster. If you have a ton of designs on the card, it’s going to take a long time to load all those designs so that they can be seen to choose from. I guess that’s why I don’t mind my floppy so much, it only allows me about 1.4megs worth of files, so keeping it small comes from necessity to do so. 🙂
When you purchased your machine, it should have given you the ability to get the design to the machine. Some manufacturers make it easy, with my Brother it’s a simple matter of copying the .pes file straight to the floppy, but with my Designer 1, I needed software to get it to the floppy. It wasn’t until many years later that software such as Embird, Embrillance and many others offered the ability to write shv files straight to the floppy without having to buy the 3D software I needed at the time I bought my Viking.
Your instruction manual for your machine should tell you how to do this. Because I’m not familiar with the various brands of machines, this is not something I can tell you how to do. Nor do any of today’s machines have floppy drives in the machines of today.
Their is a process to getting a design to stitch out once your disk or drive is loaded.
I will show this process below with my floppy drive, and while you may not use a floppy, the process is probably the same. For me, this process is the same whether I use my Brother or my Viking. I show it with my Brother since that is the machine I always embroider on.
I do not think it matters what machine you have, the process is going to be similar but your manual should definitely show you how to do it as well.
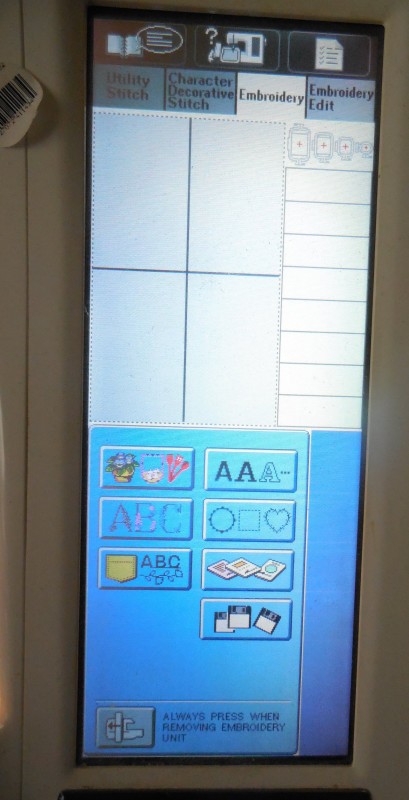
When I turn the machine on and it recalibrates the embroidery arm, it then opens this screen. My floppy should already be in the hole on the side for the machine. I push on the floppy disk picture and it brings up a screen of designs I have on the floppy.
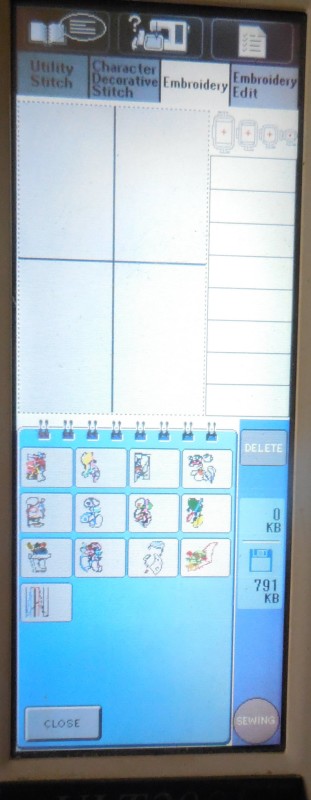
As you can see here, it shows the various designs,
when I push again on any one of the designs, it places the design in the blank hoop space above it. To get the design to stitch out, I then have to press the Sewing button on the bottom right corner once I’ve chosen the design I wish to stitch.
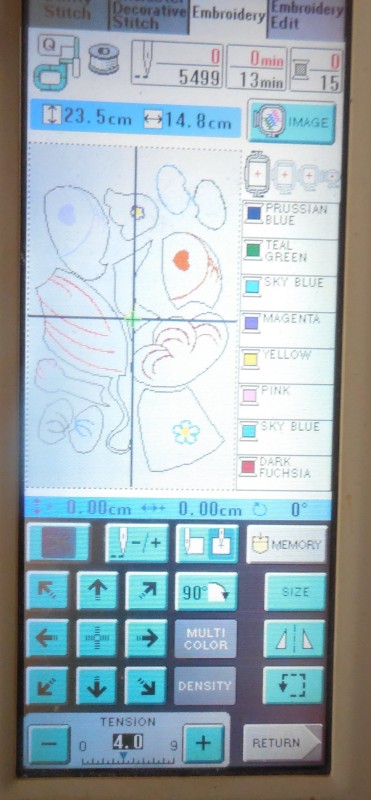
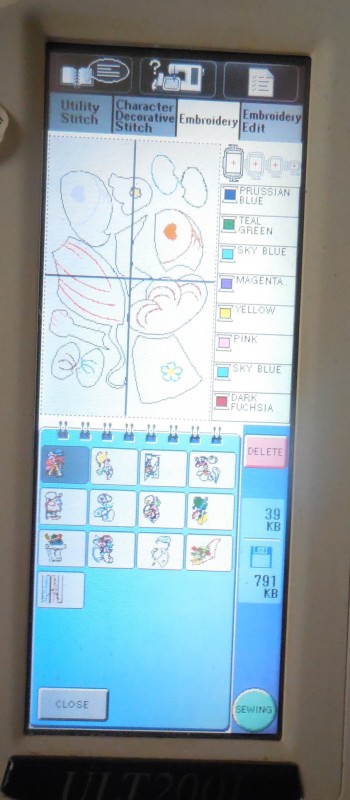
The next screen gives me a whole world of options. I rarely change these, but I have been known to move a design over a bit which is what the arrow keys do, I’ve rotated my designs (shown in this lesson)
and when I’ve made mistakes, I’ve used the image with the needle and the -/+ sign (Top row, 2nd image from left) to back track on the needle. When threads or needles break, or even ignoring my bobbin low warning window, this is a huge, huge, huge thing to be able to do in the machine so that you can easily fix when it may have stitched improperly.
I have not used the other items in this bottom window, simply because I either don’t know what they are, or didn’t need to use them.
I love all the information given at the top of the window, I love how it gives me hoop size options, and when the design can only be done in the 6×10 hoop it won’t show the other hoops. The only thing that is totally confusing is the thread chart, so I don’t use this as a color reference, but more as a reference to know what is going to stitch next. I use the charts my Bernina software produces to help me know what thread color I need. However, with my techniques for appliqueing your shapes, I do not use these as a color helper either. Instead, I use them as a helper to know what is stitching next, and then change my thread color based on the shape I’m adding. In other words, if I’m about to start stitching a hair shape, I change my thread to yellow if I’m doing blonde hair.
Thread choices are the next big thing to understand, but like stabilizers, I’m not going to write very heavily about that. Instead, I’m going to state, that I love to embroider with rayon threads. My favorites are Sulky and Robison Anton. I tend to use rayon thread because I like the shine that comes thru when stitched out.
However, depending on what your stitching out the thread choice is again very important to what your doing, so do some research and get the thread that works best on your machine. Don’t skimp here and buy cheap thread, your thread needs to be the best you can afford. Don’t overbuy what you need either. If you don’t have an industrial machine, stick to buying the 500 yds or less spools. I say this because it doesn’t take alot of thread to embroider a design, even a dense design does not use alot of thread. Thread does go bad the older it gets, this holds true no matter what type of thread you purchase. When it’s old, it frays easily in the needle, it breaks easier, and it doesn’t stitch well. If you spend 13.00 to buy let’s say a 1100yd spool and own it for ten to fifteen years without ever having used it or used it very little, you can count on the fact that you wasted your money. Don’t overbuy thread, Don’t purchase to much. If you use alot of black, yes, go for the 1100 yd spool, but if you only need a bit or red, go for the smaller spool. They may cost a little more for what your getting, but in the end you won’t have wasted 13.00.
At this point I’m going to show you how to prepare for stitching out that design.
As an embroiderer, your going to find you love either hooping your fabric, or hooping your stabilizer. I’ve tried both ways, and I came to the decision early on that I prefer hooping the stabilizer versus the fabric and it’s very very rare that I ever hoop the fabric.
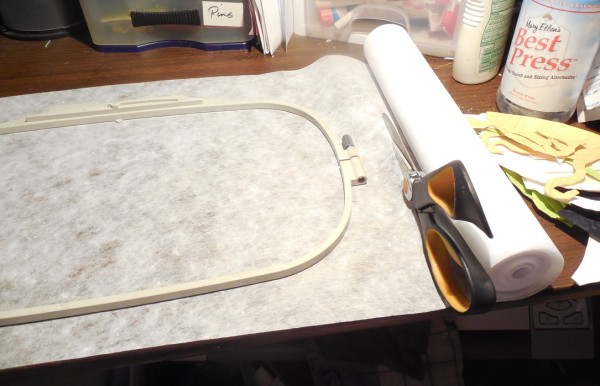
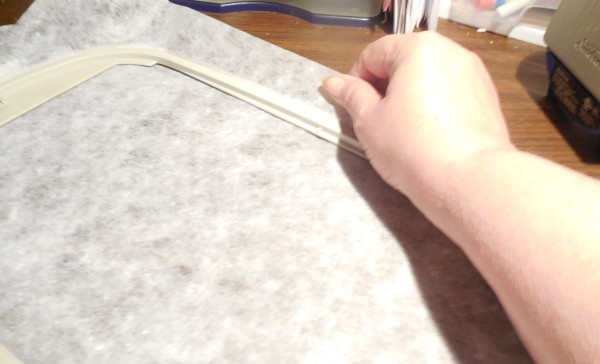
Get your hoop ready, unscrew one of the screws. Even though this 6×10 hoop has 2 screw ends, I only unscrew one of them. It doesn’t need to be unscrewed all the way, just enough for you to hoop your stabilizer or fabric.
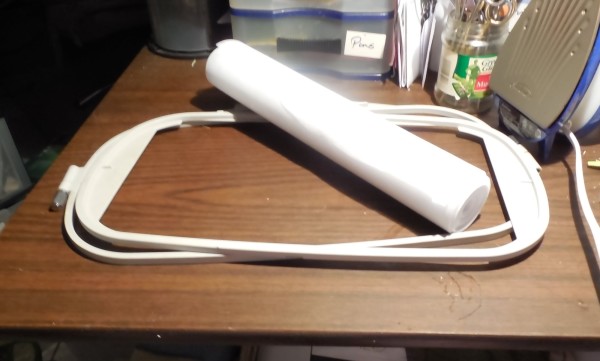
Stabilizer usually comes one of two ways, by the roll, or by the sheet. (roll can be via bolt as well, I just rarely see it on a bolt)
Get your stabilizer out.
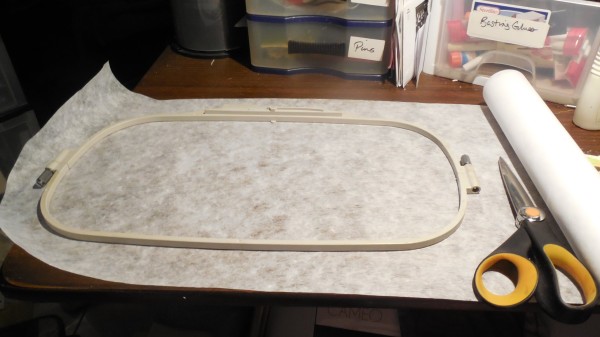
I lay my bottom part of the hoop on top of my stabilizer and overlap it just enough that I’ll have a little extra room to work with.
I then cut the stabilizer. Stabilizer usually cuts so well, you can just glide your scissors right across it so your not cutting, just pushing the scissors thru to cut it off.
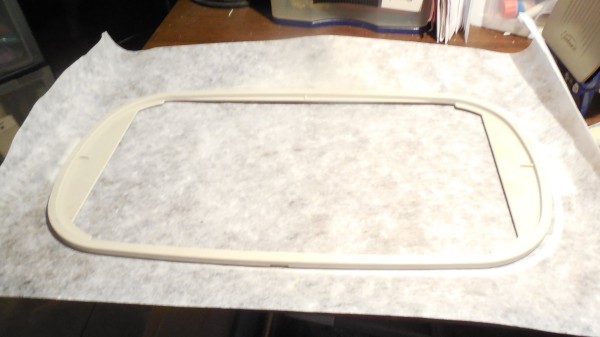
Once it’s cut, move the stabilizer to the top of your hoop you had laying over to measure your cut, then lay the top of your hoop on top of the stabilizer.
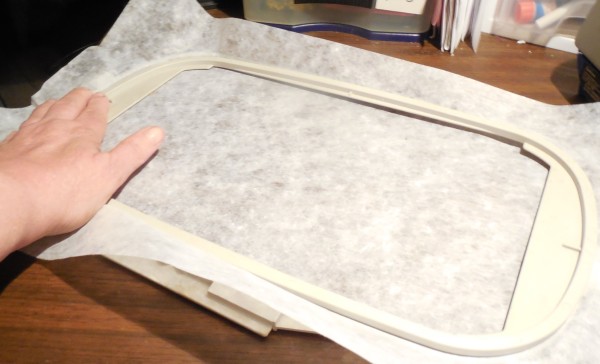
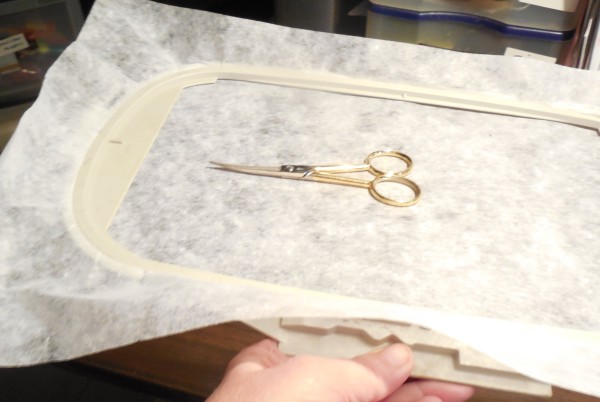
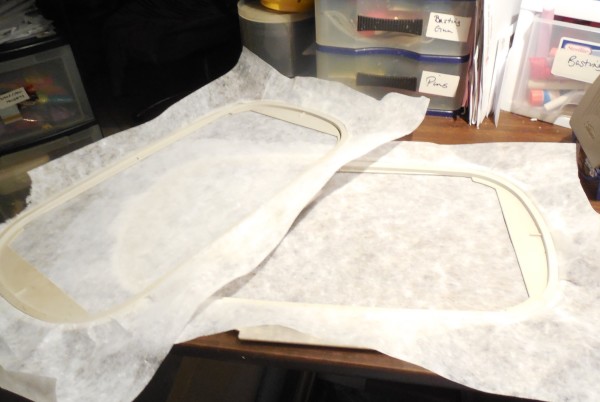
Holding one end of the hoop, then holding the other, press the hoop inside so that it fits snugly.
Once it’s snapped in and fitting snugly, firmly, but not to firmly check the stabilizer so it is also firm in the hoop.
Tug lightly in any areas of the hoop on the stabilizer that do not feel firm. With lightweight tearaway, be especially careful doing this.
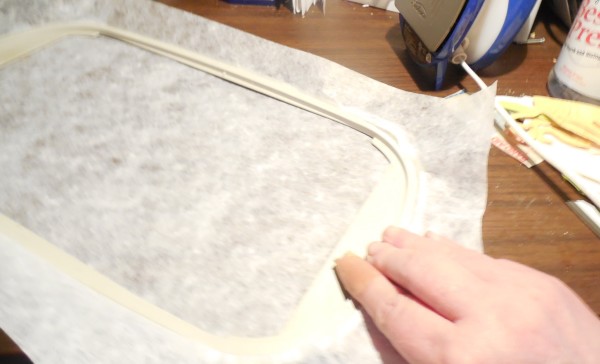
Screw the hoop screw back into place then test the firmness. One wouldn’t need scissors here to do this, I used scissors to show you that mine is pretty firm in it’s hold in the hoop.
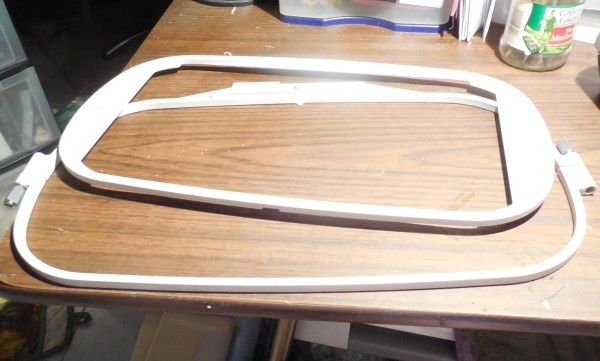
When I first purchased my Ult, I purchased additional hoops, so that as one design is stitching out, I could prepare another hoop. I did this with the 5×7 and the 6×10 hoops. I didn’t do it with the 4×4, because I honestly didn’t see myself using it enough to warrant having a second hoop. I’ve never needed that second 4×4 hoop either.
I didn’t do this with my Viking for some reason, but I have purchased all the hoops that one can use with both machines including continuous hoops.
I like to prepare the hoops so they are ready to go. However, I don’t over hoop either, I only prepare what I need at the time I need it. If I end up having a prepared hoop and I don’t need it, I unhoop the stabilizer and put it away. This is especially true of water soluble stabilizer that are clear (not woven) because they will dry out.
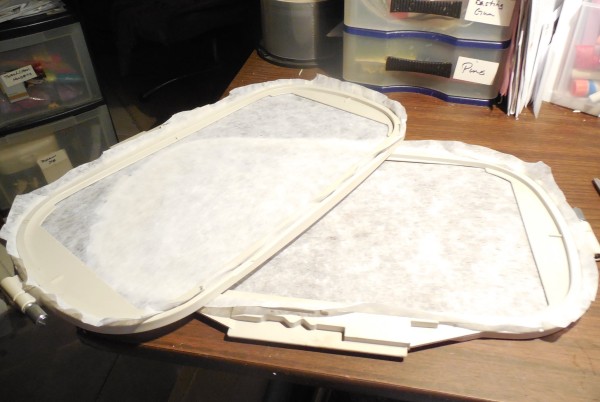
I will then cut around the edges, cutting out the extra stabilizer on the edges so that my fabric will lie better over the hoop. If you don’t do this, it’s much easier for fabric to fall into the hoop while it’s stitching out. Which is never a good thing to have happen.
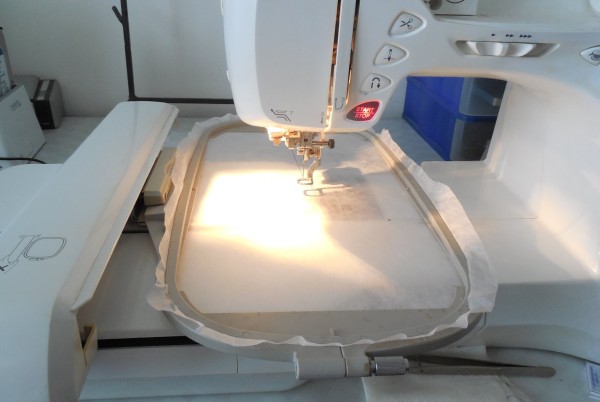
Place your hoop into your machine, check the needle, if the last time you stitched was heavy stitching, change the needle.
In any type of sewing, it doesn’t have to be machine embroidery, changing your needle often is a good thing. It saves you from horrible repairs down the road, they are less likely to break and the stitchout you receive is far superior to an old needle.
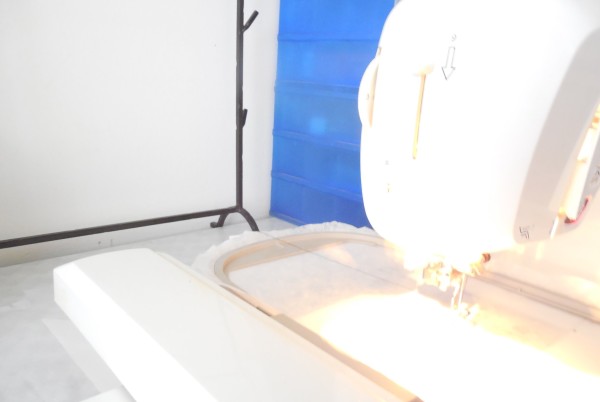
Check the back of the hoop area, make sure there is nothing that can make the hoop stall from moving. I recently had a problem where the blue storage bins you see in this image were actually slightly in the way of my hoop, and while I didn’t break a needle with the stitchout, the hoop moved but in a heavy way, which made the stitchout come out improperly, nothing was lining up properly. Until I figured it out, I was going nuts trying to find out what the problem was. I even re-digitized the design to see if that was the problem and it wasn’t. So don’t skip this step, it can happen to you.
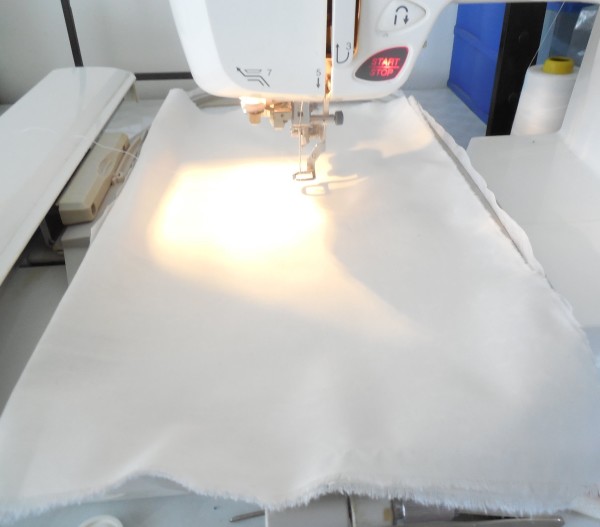
Lay your fabric on your hoop.
At this point if your going to do a basting stitch, you may want to take the time and put the basting stitches in your embroidery machines memory so that they are easier to get to and you won’t have to add them to your designs manually in editing software. 🙂
I don’t often use basting when I stitch stuff out, but I have been known to do it when I have dense designs to stitch out so I keep various basting stitches in my machine’s memory to use.
Once your fabric is in place you can then start stitching.
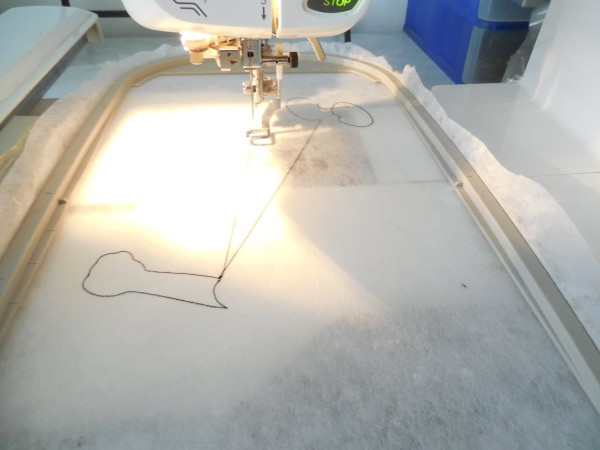
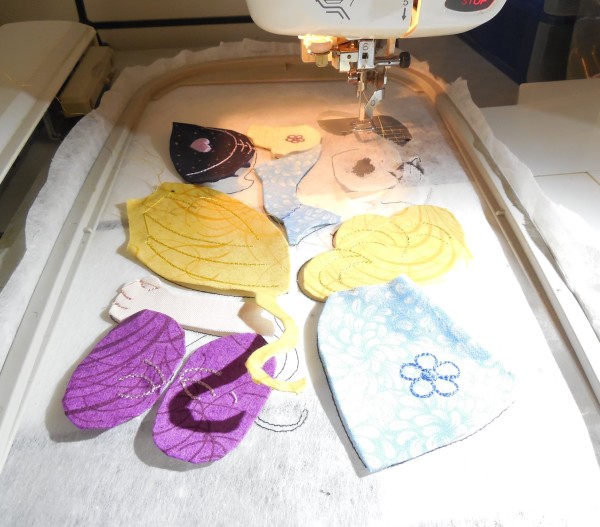
For this design I didn’t need to add fabric yet, I will add it later as I stitch the shapes themselves.
This shows that stitchout once it’s all finished.
It’s a good thing to get in the habit of cutting jumps between each thread color change or each needle stop.
You don’t have to do the bottom of the hoop each time, but doing the top one will keep the thread from moving out of your last stitched design when it’s pulling that thread to the next part of the stitchout.
Once you finished stitching and you are removing your stabilizer from the hoop, try cutting the jumps while they are still in the hoop on the bottom. They are still taut this way, and easier to cut. If you remove your project from the hoop first, it’s hard to see and cut those jumps. You can’t get them all, but the long jumps are better to get cut while still in the hoop first.
From Digistitches, this is a nice video on the basics.
Youtube has many videos available to help you understand how to use your machine, how to machine embroider, even going thru different supplies needed and various ideas for projects. It’s worth it to have a look.
Their is so much more to know and do, and it’s good to take the time to go thru your manual trying the various ideas. Even if you don’t stitch something, play with your buttons to learn what they are.
Don’t be afraid to try machine embroidery or any technique. I love trying something new, and yes, most of the time, my “new” thing doesn’t turn out perfectly, but you will only get better the more you do it, and the more you do it the more you learn and grow.
As a final note: Please do not share designs. Digitizers will not put up with it and their is a list out their of people who have shared designs in the past. It’s very easy to want to say to a friend sure, let me put this on a cd for you, but if that friend shares that design down the road as well, it could get around and eventually the digitizer will find out that you shared it. It’s just like anything you buy on the net, when you share quilt patterns, or project patterns, magazines, books, etc, you can and will end up on a list of people who share as well some carts even have your name listed and will ban you from purchasing further from them. Please, I simply can’t stress it enough to you, just don’t do it. Say no to that friend, instead point her in the direction of where she can buy it and feel free to tell her why.
Note: Using the print options for this page will not load the video themselves into the pdf or the print file, but will give you the links that you can visit to view the videos.
I hope you have enjoyed this lesson and I hope it will inspire you to try machine embroidery.