
 1 . Working With Patterns
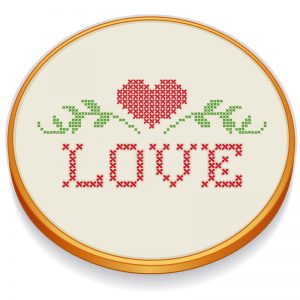
Designs are embroidered by using DMC embroidery floss to put X’s on the fabric material similar to emblems on the chart. Every symbol on the chart signifies one X on the cloth. The various symbols on the chart signify distinct shades of DMC floss. For further in depth guidelines, you can read through our cross stitch guide. With bigger patterns, you could have quite a few pages. Many individuals begin with the page in the midsection of the pattern and begin stitching at the middle of the design as well as the center of the fabric. You may begin just about anywhere although as long as you count up the fabric weave properly to be certain that the design and style will turn out centered on the fabric. You may use the figures printed out along the top and left area to tell you exactly what row and column you are at and use that to direct to the similar hole on the fabric. Some folks may even loosely sew in components of light stitching thread at intervals of 10 square (and pull it out as you go) to help keep a count of the line and column number on your cloth. On some designs, you will find three rows which are shaded displaying the adjacent rows from your previous pages. This is just for your guide to help with maintaining your place and is otherwise overlooked.
2. Type of Fabric
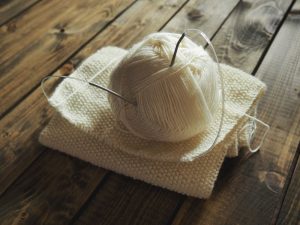 Despite the fact that it’s outlined on the pattern, you will be free to pick any variety, count or shade of evenweave fabric to sew on or linen, aida and so on. The only thing that will change is the stitch size of your completed piece if you should select a various count of the fabric. Different counts and stitched dimensions might be outlined on the pattern. Make sure to include at least 3″ or 4″ inches wide of extra fabric on each of your side to allow for finishing as well as framing. The appearance of the fabric in the background may also be essential when picking fabric so you should think about both color and the texture.
3. The Needle to Use
Counted cross stitch must be carried out using a tapestry needle. Again, there are absolutely no set guidelines but typically, what you utilize is:
#22 needle for fabric count 14 or less
#24 or #26 needle for fabric count 16-18 count,
#26 needle for fabric finer than 18.
The floss density and quantity of strands utilized may also affect the selection of needle sizing.
4. Amount of Strands
The floss’ number of strands will be illustrated on the pattern but, as with the majority of items in cross stitch, it is open to person’s preference. Usually, you want a specific quantity of the background cloth to remain noticeable, but some individuals prefer a bigger look. Some typical options are 2-3 strands for 14 count, 2 strands for 18 count, and 3 to 4 strands for 11 count. Consider a few stitches on a scrap of the project’s cloth to determine if you like the look. Before you decide to stitch, separate the floss into individual strands, then recombine them.
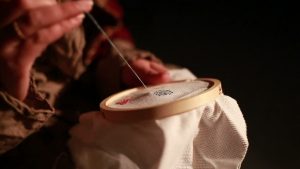
5. The Way to Stitch
The pattern needs to be centered. You can locate the middle section of the fabric by folding it in half, then folding it in half the other way. Find the middle of the pattern, marked through arrows, on your graph. You may either begin sewing in the center or count up the number of squares (stitches) over from the midsection, on both the graph and the fabric to where you wish to begin. What most people do is they begin at the top left.
Never utilize any knots to begin or end. To start stitching, take the threaded needle upward from the back of the fabric leaving behind about a 1″ tail of thread right behind the cloth. Stitch the following 5 or 6 stitches above the tail. Cut off the additional strand. To end off, interweave your needle back with the last 5 or 6 stitches and cut the thread short so as not to make a loosened end.
You will find 2 techniques to sew. The very first approach is to work a row of half stitches ////, then work again \\\\ to finish the X”s. Make use of this approach for most stitching. The next technique is to finish every X as you go. Work with this process for vertical rows of stitches or even singled out stitches. In all instances the X”s must be crossed in the similar path or the completed part will look unequal. That is, the top strand of the X must steadily slant within the same way. It is not important which way they slant, provided that they are consistent. As you sew the thread can distort so, you should commonly let the hook and thread hang free right up until it un-twists.
6. Carrying Threads Over
Occasionally a color will have just a few stitches and after that will jump to a different spot. Quite often you must finish off and begin once again. Also, you can bring the thread along the back. Just moving from place to place is less difficult than beginning and stopping, but occasionally the actual thread will show through. This is often a challenge if you jump a darkish thread through an unstitched area of the light cloth. Normally, you can carry the particular thread to a different spot when the jump is small, and you also are jumping over a sewn region. Also, you should not quit sewing at the pattern page boundaries. If a particular color goes into the following pattern page you need to switch pages and keep stitching, or else the page changes can be noticeable on the stitched piece.
7. Trying to Keep Your Place
Put a mark on the stitches you’ve finished on the graph with a highlighter or clear marker. You may find the more dark marker pens available in blue, green and pink. They are easier to see than yellow-colored ones. If you prefer, you can print out an additional copy of your graph for tagging uses.
(Keep in mind it’s a violation of copyright laws to create extra copies, on paper or even electronically, to sell or offer though. )